
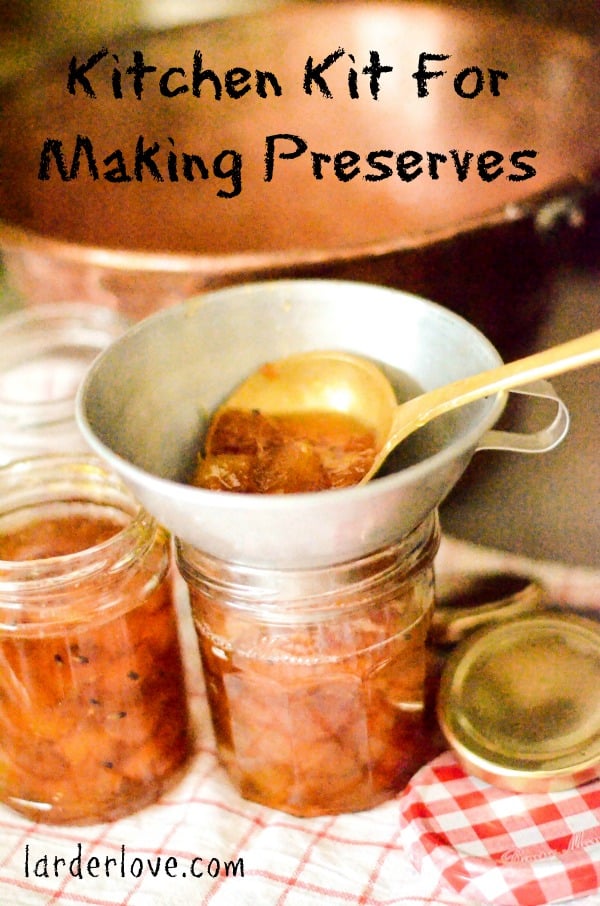
Kitchen crafting should be enjoyable and satisfying and not something that drags you down or breaks the bank, oh, and it should also be safe! So, like any form of crafting and making you need to follow a few simple guidelines and use the correct tools for the job.
Here is a list of items that will make this preserving lark a whole lot easier, your kitchen kit tools for preserving.
These are the items I use in my kitchen and if you click on the bold titles you will see them on Amazon.
PRESERVING PAN
Now before you groan and curse me saying you can’t afford to lash out on a fancy new pan, let me just say that any heavy based pan will do but you want something non-reactive like stainless steel or enamel coated pans for vinegar based cooking of pickles and chutneys.
A good preserving pan will see you through all your preserving adventures and is well worth the money.
BAIN MARIE/DOUBLE BOILER
This is a must for making curds as you want to cook them slowly over a gentle heat and a bowl suspended over water is the way to go. If you don’t want to buy this specialist pan just make sure that you have a glass or ceramic bowl that will fit comfortably over a pan and still allow headspace between the simmering water in pan and base of bowl.
This is also your go-to pan for melting chocolate and making truffles and the like.
THERMOMETER
While I use the good old chilled saucer method for testing the setting point of jams and jellies, I also have a jam thermometer that I clip on to the side of my pan to check my setting point by temperature. Go for one that can either clip or hang on the side of the pan to keep your hands free. This one has full information on temperatures you might need clearly written on it which is good.
JELLY BAG
You don’t have to go out and buy a special jelly making kit, but to be honest if you are going to make preserving a bit of a habit then having a jelly bag is a very good idea. This one has a little stand which you can clip on to a bowl or wide jug so all the juice drips directly where you want it. It is also not on huge long legs so easy to deal with.
I use mine doe straining liqueurs as well so its something that gets used a lot and well worth the money.
I have used cheesecloth and muslin to make my own jelly bags and I know of some friends who have made good use of old tights (clean of course!) to strain their precious jelly.
JAM JARS
Since I like to make small batches of jams and chutneys I tend to go for smaller sizes of jars like these 250ml jars. They are a good size so that you get through your jam etc quite quickly and also perfect for gifting and sharing the bounty of your kitchen crafting.
Also, never throw out a good jar from something you have bought in, I recycle jars all the time and always ask friends to keep their empty jars for me.
JAM FUNNEL
This is a very important piece of kit and one I wouldn’t be without. While you might not actually be playing with fire when you move your preserves from pan to jar, you are dealing with some pretty hot and dangerous stuff, don’t take chances and think you can just pour straight into jars without spillage. Invest in a good jam funnel for your own safety, and boy will it save you time on clean-ups!
This one comes with two different sizes of funnel and also has little removable strainers so it can be useful for straining sauces etc too.
SIEVES
A good stainless steel sieve will be used in so many ways in your kitchen. From sieving flour and sugar to pressing the berry pips out of raspberries etc when making a seedless jam. You can also use them for straining cooked veggies.
Line your sieve with muslin or paper towels for straining your homemade liqueurs. this is a set of 3 different sizes which is really useful.
SLOTTED SPOONS
This is something you will need to remove the scum that bubbles up on the top of jam when it is almost ready. You will probably already have one in your kitchen arsenal, but if not this is a cheap piece of kit that you will find invaluable.
LADLE
A ladle is a must for scooping your preserves into jars. Don’t be tempted to try to use a cup of even a smaller spoon, remember you are dealing with hot stuff here so use a ladle which scoops up a good amount of preserve at a time and keeps your hand at a safe distance from the heat.
CANNING PAN
A specialist giant sized pan with rack at bottom and well fitting lid is available for this purpose. This one I have linked to has all the kit you will need from the pan itself to jar lifters and even safety gloves.
However, if you aren’t going to be diving into canning in a big way just make sure you have a big old pan with lid on hand and search out some sort of grid to put in the bottom to stop the jars from resting on the actual base of the pan itself.
JAR LIFTERS
If you are using the water bath canning method you will need jar lifters which look like odd scissor like contraptions crossed with giant eyelash curlers, odd but essential to save yourself from burns. these are also very useful for hoiking jars out of seriously hot water when you are sterilising them.
CHOPPING BOARDS
Another of my obsessions is collecting vintage chopping boards, come on, show me a foodie photographer who isn’t into them! Plastic is hygienic and easy to clean, but lemon does a great job of cleaning good old-fashioned wood. Your chopping board is also a great base for your hot jars as you are filling them.
This is a great set with a large wooden chopping board plus extra plastic mats for cutting up different things from meat to veggies etc.
KNIVES
Any chef will tell you that the most dangerous item in the kitchen is a blunt knife and this is so true. Keep your knives sharp and in good condition and they will keep you safe and do the job they were meant for.
You can spend a fortune on a set of fancy knives but this is a good decently priced set that will cover all your kitchen needs and even has a knife sharpener embedded into the block which is terrific.
MANDOLIN
No, not a musical instrument but a lethal weapon for cutting veggies very thinly. I can’t stress enough how dangerous these gadgets are. I have been ‘bitten’ by them all too often, serious care and attention must be taken when using one. This one comes with safety gloves – wear them!
PEELERS
Oh there are sll sorts of little gizmos for the removal of peel, pith, skin etc. This one does the job nicely and can do julienne strips too.
GARLIC PRESS AND CHERRY STONER
There are far more modern gizmos for crushing garlic but I love this old-fashioned one because it has a cherry stoner attached that is a godsend when you have a load of cherries to stone for making jam.
GRINDER/FOOD MILL
This is a great piece of kit for grinding down fruit pulp where there is skins and pips involved. You can also use it for making the best ever mashed potatoes etc.
MORTAR AND PESTLE
I love the old-fashioned mortar and pestle and have a wee collection of them for making my beloved pestos and sauces. Make sure you get a nice heavy one.
WOODEN SPOONS
Oh no, yet another of my obsessions, I have loads of these. I love the patina that an old wooden spoon gets after years of use and cannot abide having to ‘break-in’ a new one. Wooden spoons are kind to pans and hands alike and come in all shapes and sizes. Arm yourself with lots.
SPATULAS
While I love a good wooden spoon, a rubber spatula is a must for scraping out every last drop of jam etc from your pans. They are invaluable for all other cooking as well of course. this is a great little set with different shapes and sizes.
FOOD PROCESSOR
Now if you want to take the work out of all that grinding and chopping and grating and whizzing, a food processor is a treat and such a useful gizmo in the kitchen. For all my love of vintage kitchenalia I have to say I do adore my processor!
I don’t have a big expensive fancy one, I just use this mini food chopper. It does the job well and doesn’t take up too much space in the kitchen.
SAUCERS
Always keep a couple of old saucers in the freezer so they are ready for testing your setting point when you are in the jammin’ mood.
LABELS
I am notorious for forgetting to label things in the larder. The number of times I have delved into the freezer and found stacks of flavoured butters all in a row without a label between them, or rows of jellies with no identifying labels. Oh yes, I speak from experience here, where the property folks speak of location, location, location, my mantra is label, label, label!
The original way of adhering paper labels to preserve jars was to simply paint a coat of milk on the back and slap it onto the jar. This still works well today and I still use it as it means I can fool around with designing my own labels and don’t have to print them on fancy sticky labels or anything. You can of course use plain white stationery labels or any type of sticky labels you like. just remember to do it.